how to add text over a picture in word
Whether you are a student or a professional, there will be instances that your basic layout skills will be tried by a task at hand. It could cost as simple as putting a background image on your written document or putting a short quotation on an paradigm.
Some the purpose is, you can easily fare these things in Microsoft Word. MS Word provides unusual options to place text over an image in a couple of simple clicks.

Thither are about three ways to place text over an epitome in MS Word.
3 Slipway to Place Text Over an Image in Disseminated sclerosis Word
- Using a Text Wrap Style
- Inserting a Text Box
- Inserting a WordArt
The first method is the easiest way to property a text terminated an image, particularly if you're dealing with weeklong documents. You'll uncovering the second method a trifle tricky if you have long chunks of texts to remit the image. However, text boxes do give you more exemption in price of customization. Finally, the last method is more peculiar. WordArt was a furore back in the early 2000s, but with the rise of different layouts and photo-editing software package, it gradually missing its charm. Disdain that, this method can still equal useful if you just need to add a simple text over your image.
Having said that, here's everything you penury to know to place a text over an icon in MS News.
Method 1: Place Text Over Figure Using Text Wrapping Style
If you have a long chunk of text and you reasonable want to frame a background image OR a watermark on a document, then this method acting is best for you. This method employs the use of text edition wrapping styles to overlay the text terminated the image.
Here's how you can do that!
Stair 1: Open a Word document.
First off, we need to open skyward a Word document. Feel free to exercise your own personal document if you have one already opened. Other, you can always create a new blank document. Now, get into't worry some messing upward your file, American Samoa these changes rear end easily embody unstuck.

If you opted to create a new written document, you'll call for to insert a picture and typecast in some schoolbook. Countenance's go ahead and do that by going to the Insert tab and clicking on the Pictures button. This testament launch the Tuck Envision dialogue loge. Browse and locate the picture that you require to use.
Step 2: Set the image as backclot.
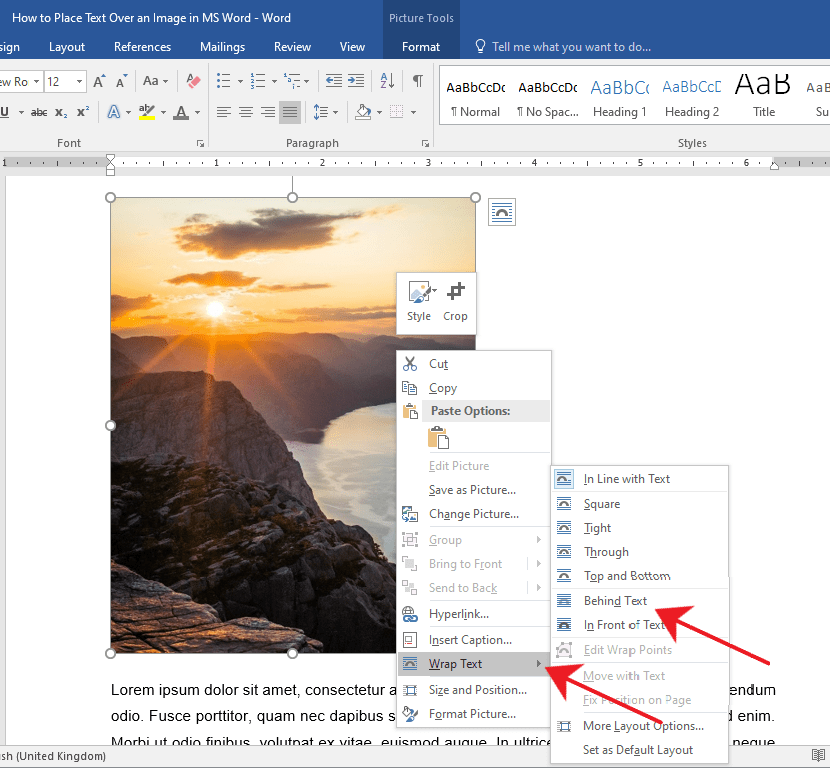
Now that our document is opened, right-click on the image and select the Wrap Textbook option. This will show a horizontal miss-down menu on the satisfactory. Erstwhile you see the drop-down menu, select Behind Text. You'll notice the images and text leave rearrange automatically as you hover over the textbook wrapping options.
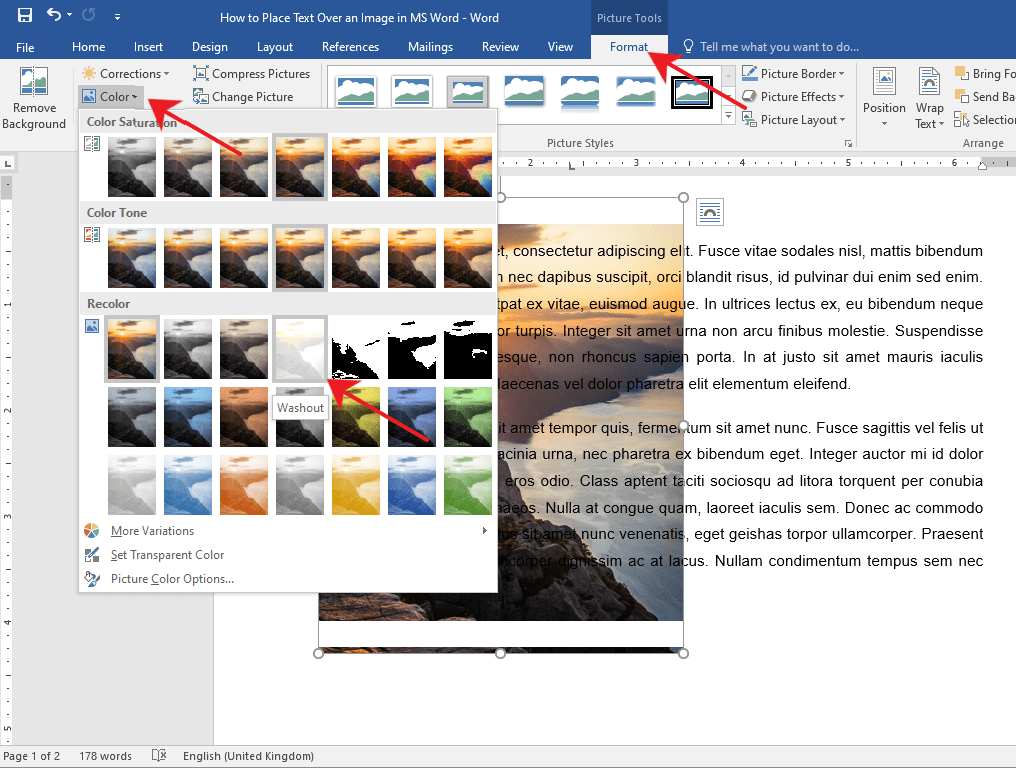
If after you've inserted a backclot visualise and the text becomes unreadable, you can change the look-alike's opacity or color. Don't worry, as this is a common obstacle when blending text colors with the background. Only double-click on the image to activate the Format tab in the Ribbon. After that, detent on the Color leave out-down menu and select Washout under the Recolor group. You can also get creative and search the other options to fit your needs.
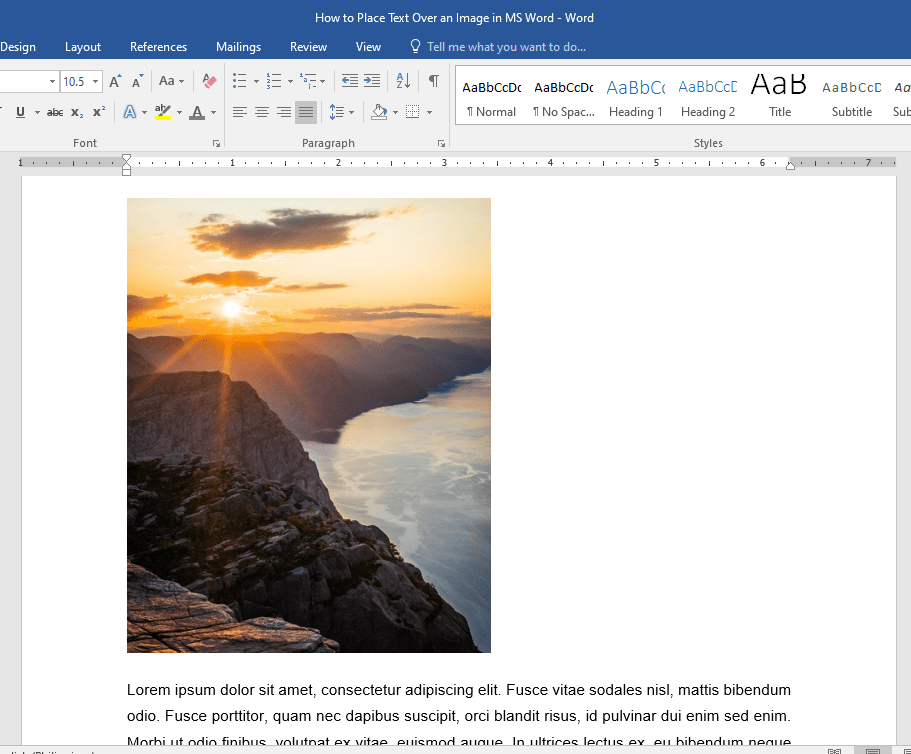
Congratulations! You've just placed some school tex over an figure in MSc Word.
Method acting 2: Place Text Over Image Using a Text Loge
If the text that you want to place over your prototype is not that long, say it's conscionable your favorite citation or peradventur a short-circuit poem, so this method acting is for you. Text boxes provide more tractableness in design. This is particularly stabilising because you can besides move them around easier.
Here's how you can use school tex boxes to place o'er images.
Footprint 1: Open up a Word document.
First things first, we'll call for to pioneer a Word text file. You can go ahead and use your personal document if you have it opened already. Don't worry about making mistakes, arsenic any unwanted changes can easy be undone.
Tread 2: Insert a school tex box.
Go to the Insert tab on the Ribbon at the top portion of MS Word. The Ribbon is where you can find the format tools such as Fonts, Paragraph Formats, Heading Styles, etc. Now, navigate to the right side of the Ribbon and click on the Text Box cliff-down menu. Then, pick out a schoolbook box style of your preference. For this example, we'll use the Simple Text Box.
Step 3: Type in the text.
Character in the textbook that you want to put happening upper of your visualize. If you already have your text prepared elsewhere, simply copy-paste it inside the school tex box.

Pace 4: Set up the text wrapping style of the text box.
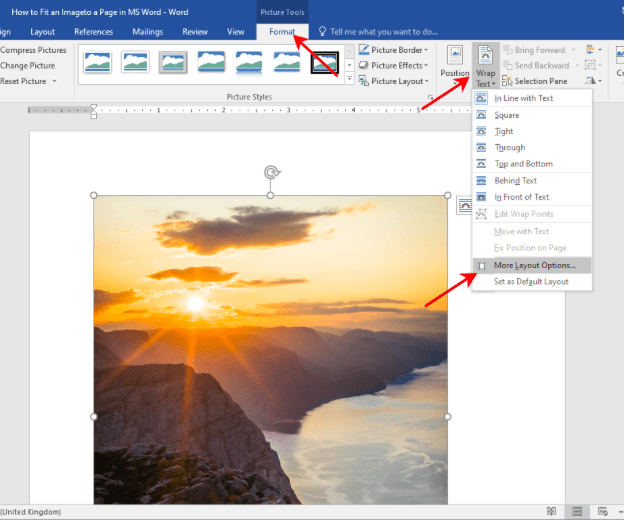
Select the text boxwood and click the Layout button found at the upper right-hand tree of the text box. Then, select the In Front of Textual matter option.
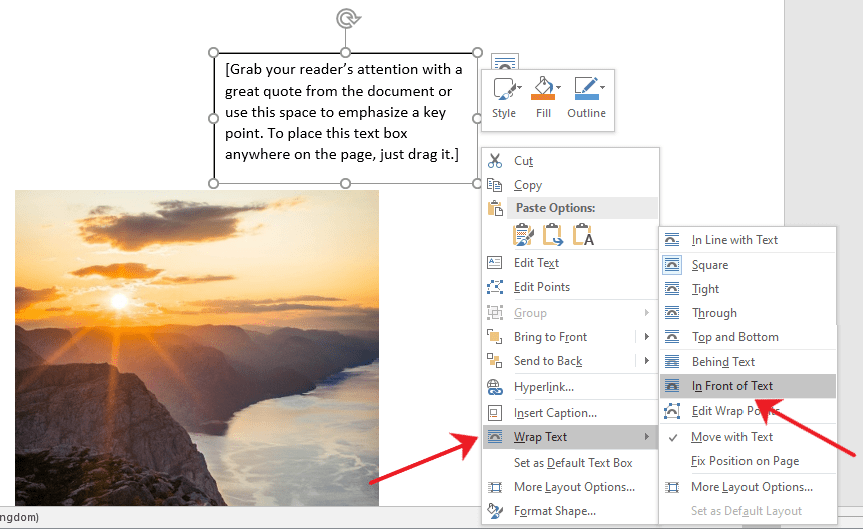
Step 5: Place the text box over the image.
Detent and haul the text box to place information technology terminated your image. You'll notice that your text loge has a play down color by default and is covering a component part of the image.

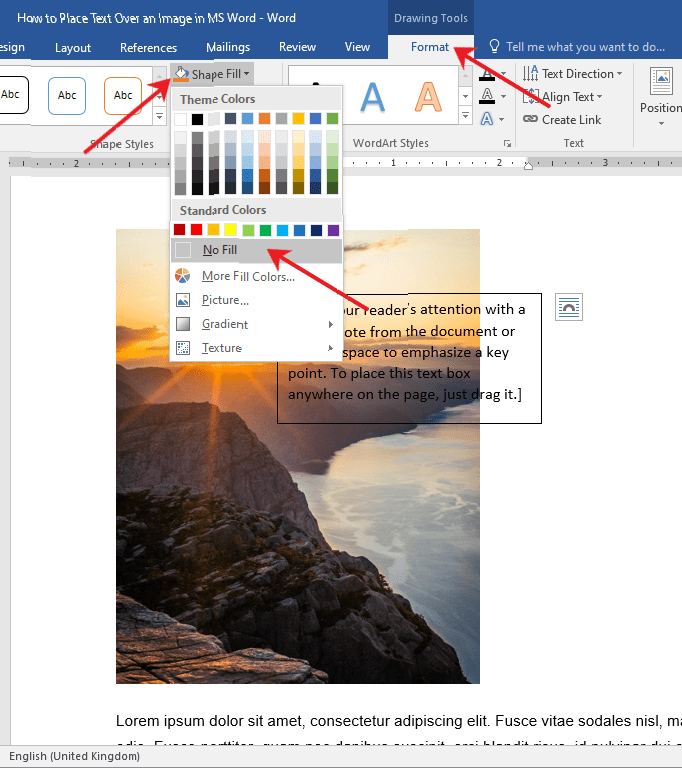
You can change your text box's background and border color by accessing the Format tab. This right smart, only the text will be overt on top of your image. Now, Double-click the text box and go to the Format tabloid. From there, click on the Shape Fill drop-falling menu and choose No Make full.
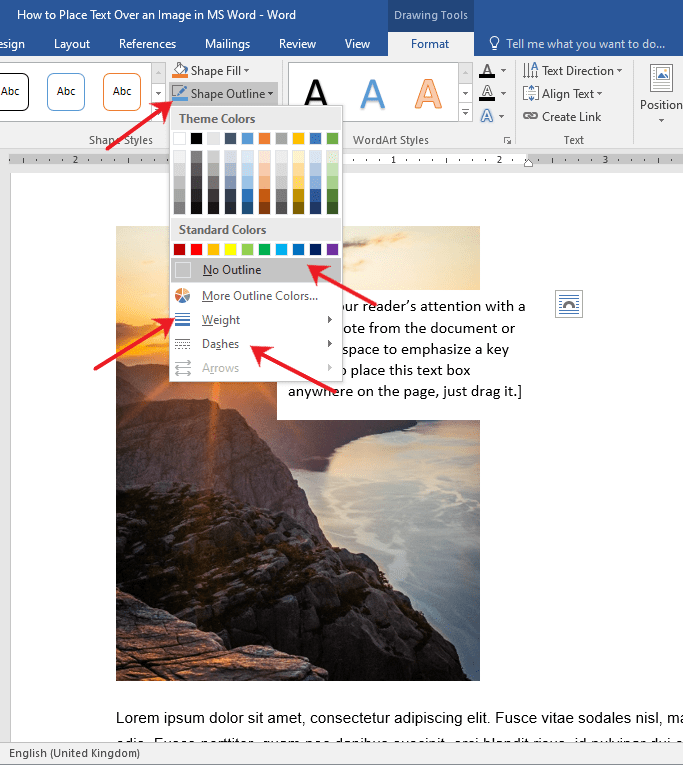
To change the border color, select the Shape Outline dribble-John L. H. Down fare and choose No Outline. You can also change the boundary line's weight and design past exploring the Dashes and Weight unit options.
Voila! You've just used a text box to place text complete an image in MS Word.
Method 3: Place Text Finished Image Victimization Word Art
If you find yourself needing to put a title, a name, operating room a couple of words finished an image, then this method acting has got you covered.
Here's how you potty employ WordArt to place textual matter over an effigy!
Step 1: Open up a Phrase lodge.
Before anything other, we'll need to pioneer a Word of God file. Feel free to enjoyment your own personal document for this step. If you're worried about destroying your document, don't be. Every the changes made throughout this guide can be easily reverted. . Remember to hit the CTRL + Z keys on your keyboard to quick undo any unloved changes.

Dance step 2: Insert the WordArt
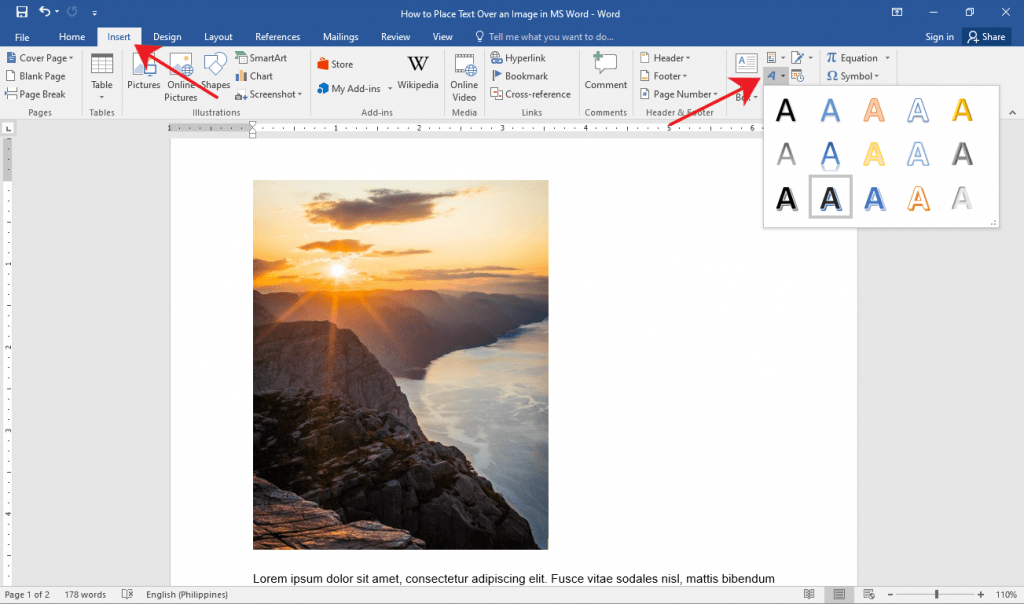
Once your written document is ready, go ahead and detent the Insert tab on the Ribbon. Today, click the WordArt button found at the right side of your screen. IT's the sloping letter A icon under the Text group. After that, choose a WordArt that suits the style of your document.
Step 3: Site the WordArt over the image.
Click on the WordArt and type in the text you want. From in that location, select and drag the WordArt to easily motility it around to the perfect location along your document. You can also resize the WordArt like any other text box away grabbing either unmatched of its corners.

Tip: If you'atomic number 75 using a pen or touch-enabled computer, you can directly drop a line text over an image using the Draw alternative.
Congratulations! You've just used WordArt to set back text over an image in MS Word.
Editing and Deleting Text edition Over an Image
Let's say you're now quenched with how your document looks, but suddenly, you noticed a typographical mistake in your text edition. Don't fret because editing or deleting that text all over an image is no sweat.
If you used Method 1, simply select the erroneous text edition and edit out operating room cancel information technology retributive as you would with any past text.
For Methods 2 and 3, click on the within of the text box or the WordArt and start editing. If you want to edit the whole text package or WordArt, fall into place on any of the borders of the text boxwood or WordArt and hit the Erase button on your keyboard.
Conclusion
You've fully reached the goal of this tutorial. Hopefully, we've helped you fig impossible how to place text over an image in Book. Before we let you go, allow for us to give you a summary of what we've covered today.
In that article, we discussed three ways to put text finished an image in MS Word. The low method employs a school tex wrapping style to configure your see as a background image. The second method uses text boxes, while the fractional one utilizes the WordArt tool. Editing and deleting the text is as easy as adding them. Boilers suit, all three methods prove useful and have their own advantages in getting the Job done.
That's the sleep of it. We hope you've found this article helpful!
how to add text over a picture in word
Source: https://officebeginner.com/msword/how-to-place-text-over-an-image-in-word/

Posting Komentar untuk "how to add text over a picture in word"